
July 27, 2026
Architectural Uplighting in Cincinnati: How to Light Your Home's Facade the Right Way
Beam angles, fixture placement, color temperature, and real Cincinnati costs for uplighting a home's facade the right way.
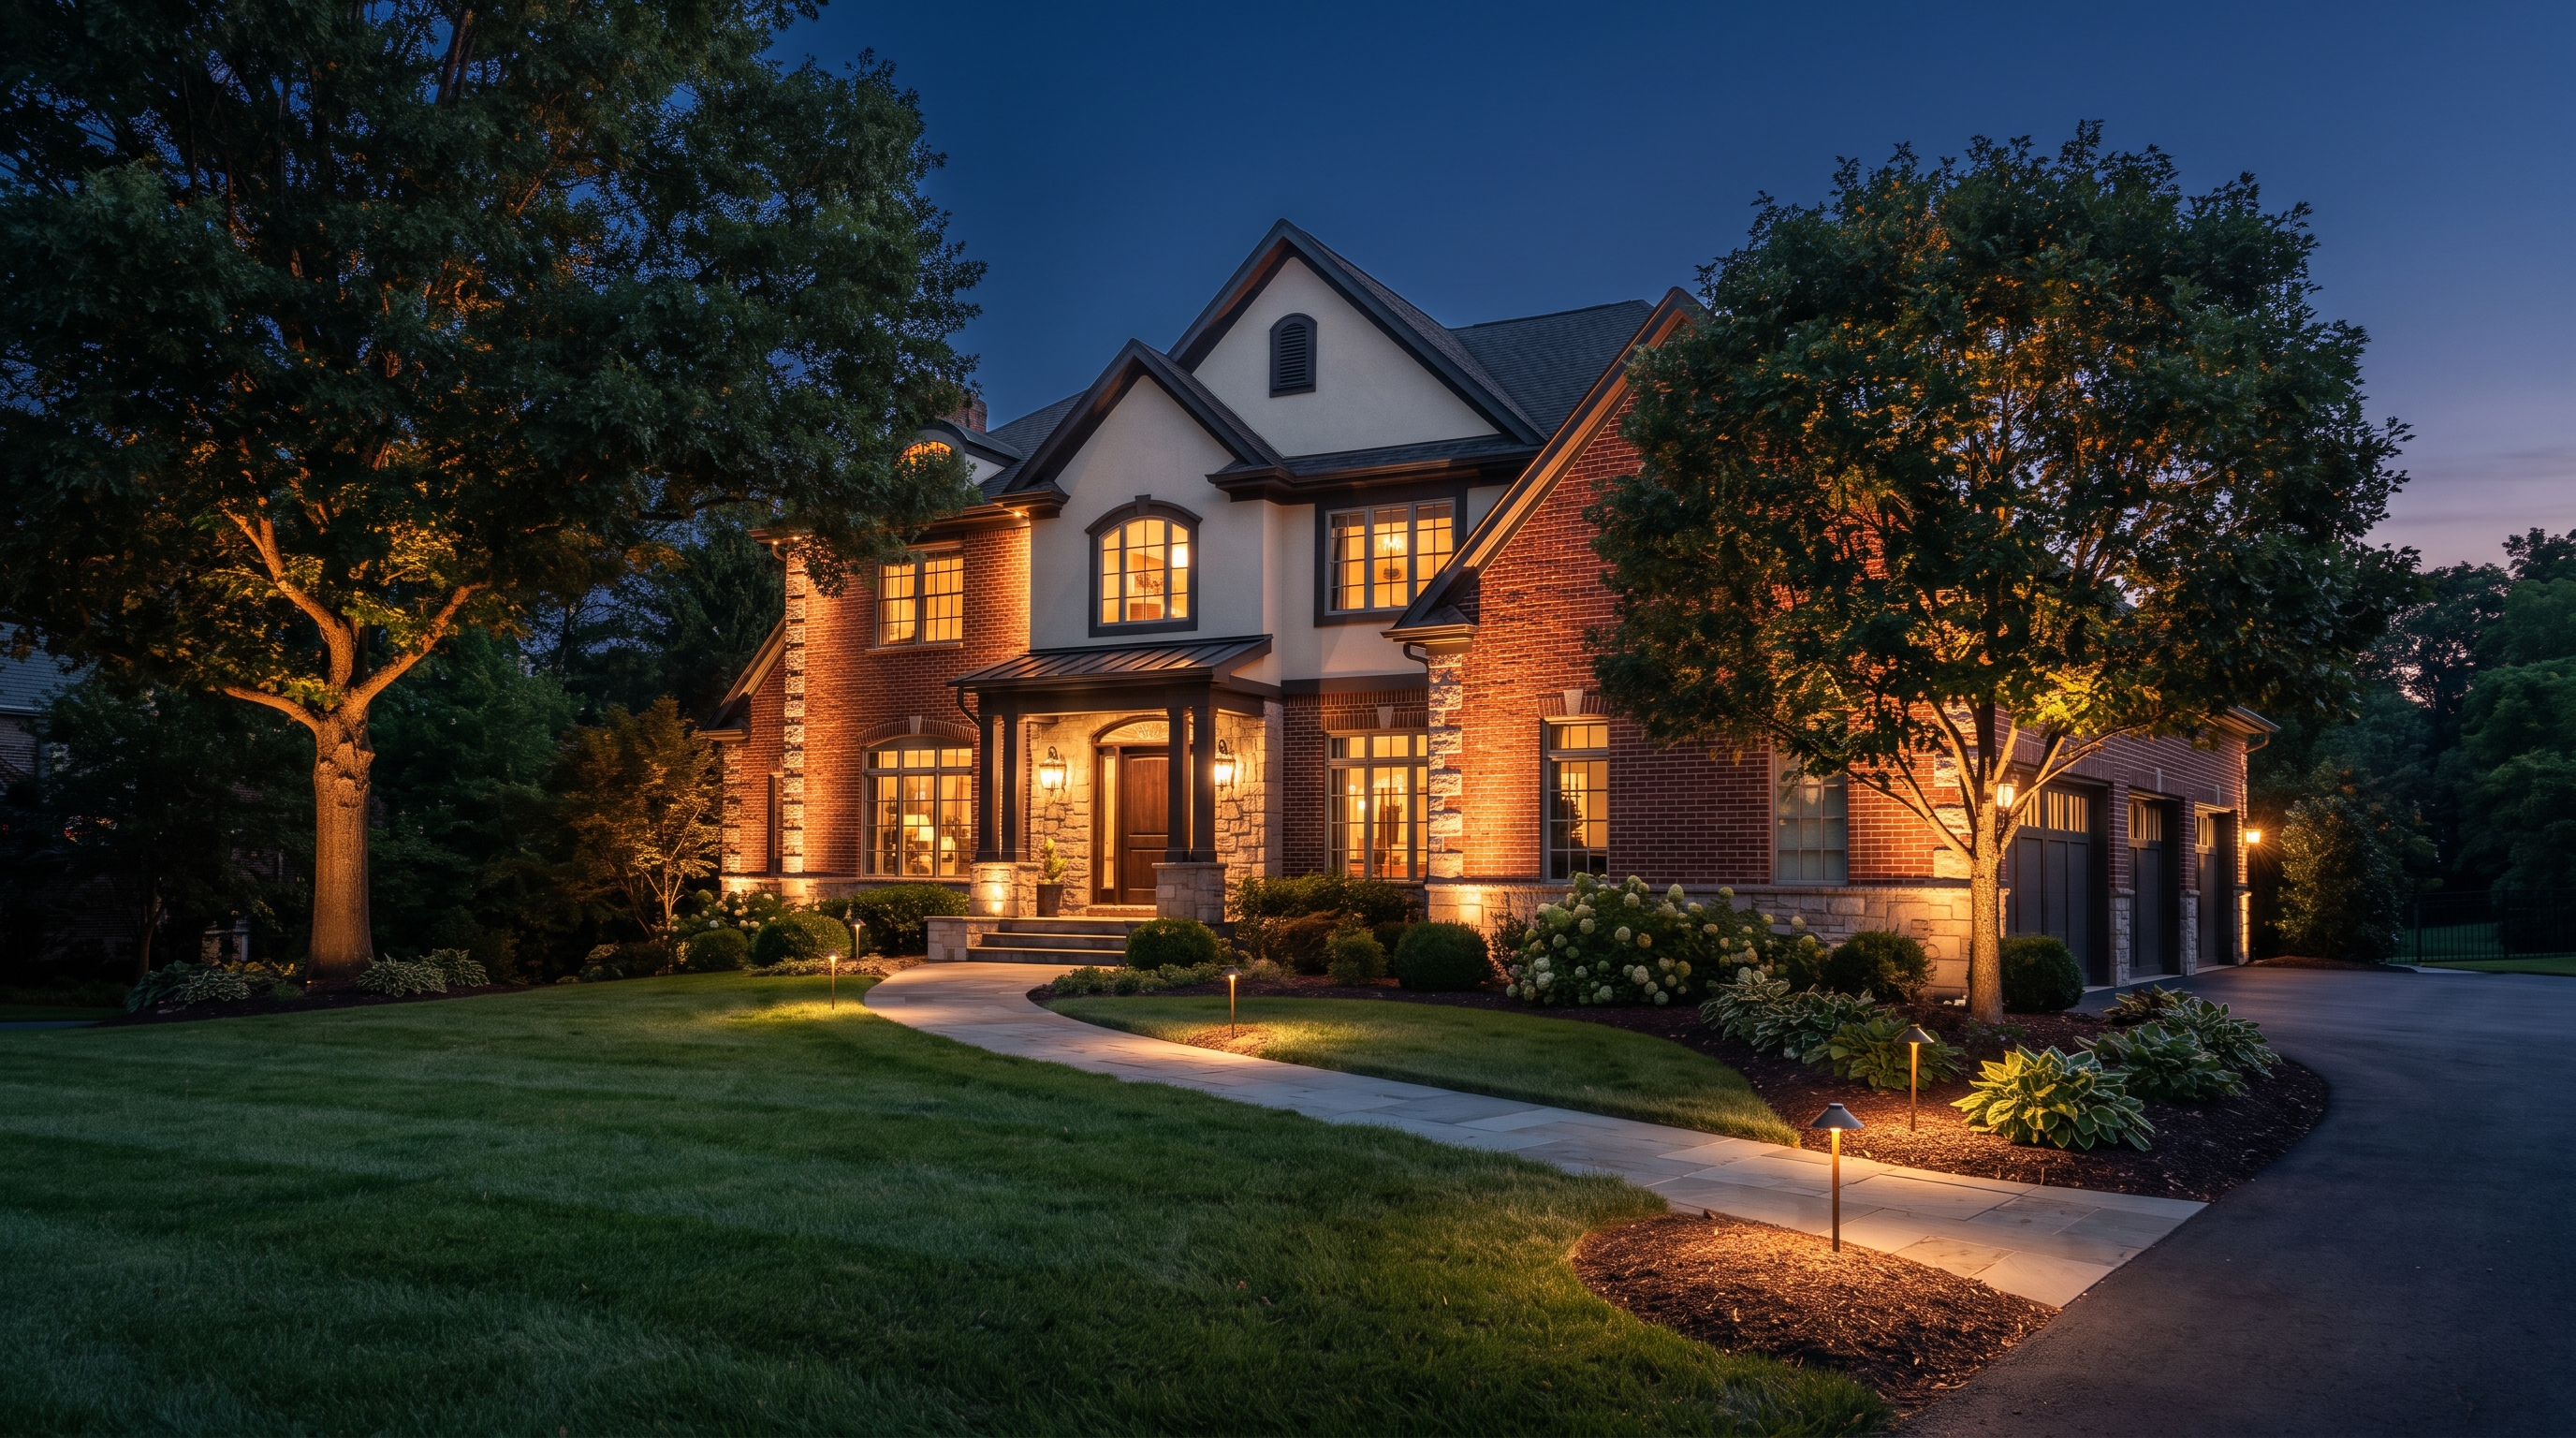
Uplighting is the technique that makes a house look intentionally lit instead of just bright. It is also the one homeowners get wrong most often, because the fixture is only half the job — the aim, the beam angle, and the distance off the wall do the rest. Here is how we approach architectural uplighting on Greater Cincinnati homes, what it costs, and what separates a facade that glows from one that looks like a car dealership.
What is architectural uplighting?
Architectural uplighting is the practice of placing low-voltage fixtures at or near ground level and aiming their beams upward onto a building's vertical surfaces. The light travels up the brick, stone, siding, or columns and reveals the texture and shape of the structure after dark.
It is distinct from the other layers in a landscape lighting system:
- Uplighting — ground-mounted fixtures washing or grazing a facade, column, or tree trunk upward
- Path lighting — low fixtures casting downward pools on walkways for safe footing
- Floodlighting — broad, high-output coverage for security and visibility
- Moonlighting — fixtures mounted high in a tree aiming down through branches to mimic natural moonlight
Most well-designed Cincinnati homes use three of these layers together. Uplighting is the layer that carries the architecture.
How does uplighting actually work on a home's facade?
It works by controlling three variables: beam angle, distance from the wall, and aiming angle. Change any one and the effect changes completely.
Beam angle determines the shape of the light. A narrow beam — roughly 10 to 15 degrees — puts a tight column of light up a chimney, a stone pilaster, or a two-story gable. A wide beam — 35 to 60 degrees — spreads a soft wash across a broad brick wall. Using a narrow spot where a wide flood belongs is what produces those harsh scallop stripes you see on a lot of DIY jobs.
Distance off the wall controls whether you get a wash or a graze. Set a fixture 18 to 36 inches out and you get a soft, even wash that covers a lot of surface. Tuck it 4 to 8 inches from the wall and the light rakes across the surface at a steep angle, throwing every mortar joint and stone edge into relief. That close-in technique is called grazing, and on Cincinnati's older brick and cut-limestone homes it is the single most flattering thing you can do to a facade.
Aiming angle keeps the light out of your neighbor's bedroom. We aim to land the beam's top edge at the soffit or roofline, not past it. Light that overshoots the roof is wasted wattage and light trespass.
How many uplights does a house need, and where do they go?
A typical Greater Cincinnati home needs 6 to 14 uplights on the front elevation, placed at the architectural anchor points rather than evenly spaced across the whole wall.
Anchor points we light first, in order of impact:
- Corners of the house — defines the building's footprint and gives it depth
- Columns and porch posts — narrow beams, one per column, aimed straight up the shaft
- Gable peaks and dormers — a single narrow spot lifts the roofline out of the dark
- Chimneys — usually the tallest vertical element and the easiest silhouette to read from the street
- Entry surround — two fixtures flanking the front door, kept low output so nobody gets blinded on approach
- Stone or brick texture walls — grazed close-in to bring out the material
Spacing between wash fixtures on a long unbroken wall runs 8 to 12 feet. Tighter than 8 feet and the beams overlap into a flat, washed-out blur. Wider than 12 and you get visible dark gaps between the pools.
The mistake we correct most often is symmetry for its own sake — a fixture every six feet in a straight line across the front, lighting blank siding that has nothing to show. Light the features. Let the plain surfaces stay dark. Contrast is what makes the lit parts read.
What color temperature and brightness should facade uplights be?
For residential facades in this market we specify 2700K almost every time, and 2700K to 3000K if the home is a cool-toned gray or white modern build.
Color temperature is measured in Kelvin. Lower numbers are warmer and more amber; higher numbers are cooler and bluer. At 2700K, warm red-brick homes look rich rather than pink, and cream limestone reads as cream. Push up to 4000K or 5000K — the range most big-box fixtures ship in — and brick turns muddy while white trim turns hospital-blue. If you have ever driven past a house and thought the lighting looked cheap without knowing why, it was almost certainly the color temperature.
On output, more is not better. Practical starting points:
- Wide facade wash: 200–400 lumens per fixture
- Two-story gable or chimney: 400–700 lumens, narrow beam
- Columns and entry accents: 100–200 lumens
- Mature tree uplighting: 500–900 lumens depending on canopy height
We would rather install a few more moderate fixtures than fewer bright ones. Even, layered light at lower output always looks more expensive than a handful of hot spots.
What does architectural uplighting cost in Cincinnati?
A professionally installed uplighting package on a Greater Cincinnati home generally runs $180 to $350 per fixture installed, which includes the fixture, direct-burial wire, trenching, connections, and the transformer share.
Practical project ranges we see:
- Front facade accent, 6–8 fixtures: roughly $1,400–$2,600
- Full front elevation with trees, 10–16 fixtures: roughly $2,600–$5,000
- Estate-scale, full perimeter and landscape, 25–45 fixtures: $8,000–$18,000
What moves the number is material and transformer sizing, not markup. Cast brass and copper fixtures cost more than cast aluminum up front and outlast it by decades in Ohio's freeze-thaw cycle — we have pulled 20-year-old brass fixtures out of a bed still working, and we have replaced 4-year-old aluminum ones that corroded through at the lens gasket. On the transformer side, we size to about 80 percent of rated capacity so there is headroom to add fixtures later. A 300VA transformer running a 240VA load is right. Running that same 300VA transformer at 290VA means the next fixture you want requires a whole new transformer.
Be careful with quotes that come in dramatically under these ranges. The savings almost always show up as aluminum fixtures, undersized wire, and wire nuts wrapped in electrical tape instead of waterproof silicone-filled connectors. Those systems work for two or three seasons and then start dropping zones.
Can uplighting be added to an existing landscape lighting system?
Usually yes, and this is a large share of the work we do. Whether it is straightforward comes down to two things: available transformer capacity and the condition of the existing wire.
We check, in this order:
- Transformer headroom — total connected VA versus rated VA, with 20 percent left free
- Wire gauge on the target run — 12-gauge handles most residential runs; long runs on 14- or 16-gauge cause voltage drop and dim, yellowed fixtures at the far end
- Connection quality — corroded or taped splices get replaced regardless of whether they are on the new circuit
- Measured voltage at the last fixture — low-voltage LEDs want roughly 10–15 volts at the fixture; below that they dim and shift color
Most other companies in Greater Cincinnati only quote full new installations, and if your existing system was installed by a franchise that has since changed hands, good luck getting anyone to open the transformer box. We repair and extend systems we did not install, and we keep parts for older platforms. If your goal is to add six uplights to a working eight-year-old system, that is a real project and you should not have to replace everything to get it.
How do you avoid the most common uplighting mistakes?
The short answer is aim deliberately, keep the source hidden, and resist the urge to light everything.
The problems we get called out to fix, in rough order of frequency:
- Glare into windows and eyes — fixed by adding a hood or glare guard and dropping the aim a few degrees
- Visible fixtures — the light should be seen, not the can. Recess into mulch, set behind low plantings, or use a well light
- Overshooting the roofline — wasted light and a complaint from the neighbor across the street
- One color temperature at the house and a different one in the trees — makes an otherwise good system look pieced together
- Fixtures buried by three seasons of growth — the reason we build in a maintenance visit rather than walking away after install
- Everything lit at the same intensity — with no dark, there is no drama
The last one is the design principle that matters most. A facade lit at 100 percent everywhere reads as flat. Pick the two or three elements that define the house — the chimney, the entry, the corner stone — light those properly, and let the rest fall off. That restraint is the difference between a lit house and a designed one.
What should a homeowner do first?
Walk your own property after dark and note what you cannot see. That takes ten minutes and tells you more than any brochure.
Then, before anyone quotes you:
- Identify your home's three strongest architectural features from the curb
- Check whether you already have a transformer, and photograph its label — the VA rating is printed on it
- Note which windows face the yard, so aiming can avoid them
- Decide whether trees are in scope now or later, since that changes transformer sizing
- Ask any contractor what fixture material they use and what the warranty covers — the answer tells you what tier you are buying
We are based in Maineville and work throughout Greater Cincinnati — Mason, West Chester, Loveland, Montgomery, Indian Hill, Hyde Park, and Anderson Township. If you want an honest read on whether your facade should be washed or grazed, and what it will actually cost, we will walk the property with you at dusk and show you the difference before anything gets installed. Call us at (513) 828-8501.
Want a property like the ones in this post?
Free on-site consultation across Greater Cincinnati.
Schedule a Free Estimate